

There’s a certain magic in the air when October rolls around, isn’t there? It’s the one time of year we’re all encouraged to be a little more playful, a little more creative, and maybe even a little bit spooky. And for me, that creative spirit always starts at my fingertips. Your nails are the perfect, tiny canvas to express your Halloween mood, whether you’re crafting an elaborate costume or just enjoying the fall vibe.
But I know the thought of intricate nail art can be intimidating. I’ve been there—staring at a photo of a perfect, detailed design, wondering how on earth I could ever replicate it without a professional’s steady hand. That’s why this guide is designed for real life. We’re going to explore a world of ideas that celebrate all skill levels, from “I can barely paint within the lines” to “I’m ready for a challenge.” So, grab your favorite polish (or just your inspiration), and let’s dive into creating a Halloween manicure that’s so good, it’s scary.
Finding Your Halloween Nail Aesthetic
Before we pick up a brush, let’s think about the vibe you’re going for. Are you channeling a cute, cartoonish witch, a glamorous vampire, or something straight out of a classic horror film? Knowing your style will make choosing a design so much easier.
1. The Modern Classic: A Fresh Take on Black & Orange
You can’t go wrong with the iconic duo, but let’s give them a fresh, modern twist that feels sophisticated enough to wear all season long.
- Color Play: Instead of a flat, bright orange, try a deep burnt orange, a metallic copper, or a shimmery bronze. Pair it with a rich, glossy jet black or even a deep charcoal grey. The goal is to create a more nuanced, elegant color palette.
- Design Ideas:
- The Accent Nail: Paint all your nails a sleek black, but on your ring finger, create a stunning gradient that fades from that burnt orange at the cuticle to black at the tip. It’s easier than it looks with a makeup sponge!
- Minimalist Art: A simple, thin white line drawing can be incredibly effective. Think a delicate spiderweb in the corner of one nail, a single, elegant bat silhouette, or even tiny candy corn dots on a nude base.
- Matte Magic: Paint your nails a classic orange or black, but use a matte top coat. Then, use a glossy top coat to draw a simple design (like a spiderweb) on just one nail. The texture contrast is subtle but so chic.
2. Subtly Spooky: The Magic of Minimalism
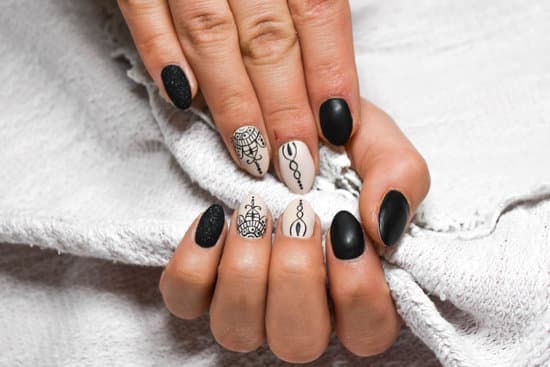
For those who believe less is more, this style is for you. It’s all about clever details and a “less is more” philosophy that feels incredibly modern and cool.
- The Power of Negative Space: Leave part of your nail bare for a contemporary look. A simple French manicure with black tips is a classic. Or, try a half-moon design at the cuticle in black or orange against a nude base.
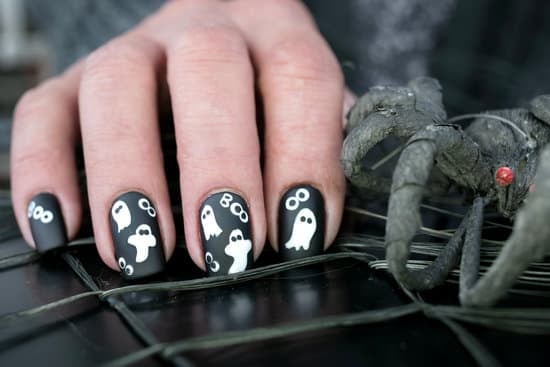
- Tiny Touches: This is where you can have a lot of fun. On a clean, neutral nail, add a single, tiny ghost, a miniature jack-o’-lantern smile, or a few specks to look like falling stars on a dark blue base. The beauty is in the subtlety—it’s a fun secret for you and those who look closely.
- Pro Tip for Beginners: If freehand drawing feels daunting, nail stickers and stamping kits are your best friends! They offer intricate designs with zero stress and can make your manicure look like it was done by a pro.
3. Cute & Creepy: Character-Inspired Fun
This is where your inner artist can truly come out to play. Bringing charming versions of Halloween classics to your fingertips is pure joy.
- Pick Your Players: Think adorable cartoon ghosts, smiling pumpkins, wide-eyed black cats, or even friendly Frankenstein bolts. You don’t need to be a master painter—simple shapes are incredibly effective.
- Execution is Key: To avoid overwhelm, choose one or two nails as your “feature” nails for the characters. Paint the rest of your nails in solid, coordinating colors like deep purple, blood red, or mossy green. This creates a balanced, polished look.
- Simple Character How-To:
- Ghosts: A white, wobbly oval with two black dots for eyes.
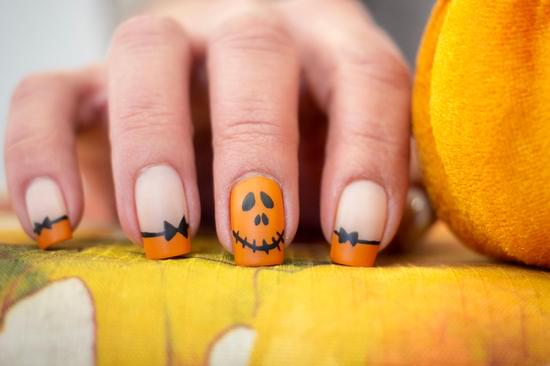
- Pumpkins: An orange oval, a little brown rectangle for the stem, and a black triangle for a nose and a jagged smile.
- Bats: A black oval with two pointy ears at the top and simple wing shapes on the sides.
4. Gothic Glam: For the Bold and the Dramatic
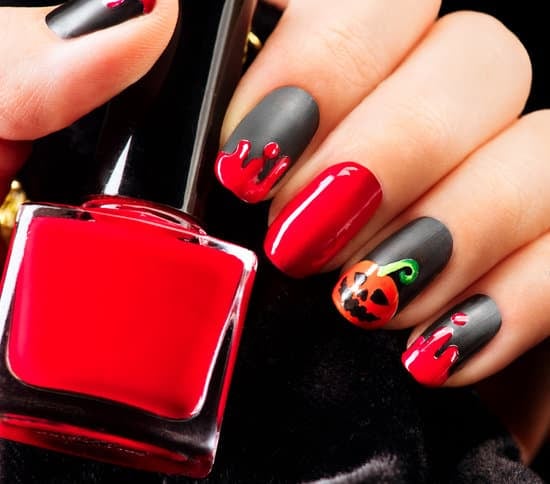
If your Halloween style is more Tim Burton than Disney, lean into the drama with these high-impact ideas.
- Blood Drip Nails: This looks incredibly cool but is surprisingly achievable. Start with a base color—a nude or “skin tone” polish works great for a realistic effect, or a deep red for a more stylized look. Then, using a red gel polish or a thick, glossy red, create drips starting at the cuticle and dragging down the nail. The key is to make the drips uneven and wavy. A toothpick or a very thin brush is perfect for this.
- Spiderweb Delight: Paint your nails a matte black. Then, using a thin brush or a white nail art pen, draw a loose spiderweb on one or two nails. Start with a small “X” and then connect the lines with curved strokes. Imperfections make it look more authentic!
- Glitter & Gore: Combine textures for a truly standout look. A matte black base with one accent nail covered in chunky black or red glitter is effortlessly glamorous and perfectly spooky.
Your Halloween Manicure Toolkit: What You’ll Need to Succeed
You don’t need a salon-full of equipment, but a few key items will make the process much smoother.
- Base & Top Coat: The non-negotiable heroes of any long-lasting manicure. A base coat prevents staining (especially from dark colors) and helps polish adhere. A good top coat seals your design, adds shine, and prevents chips.
- Essential Colors: Black, white, and orange are your foundation. From there, consider adding a nude, a deep red, and a dark purple or green for more variety.
- Tools for Detail: A thin nail art brush or a set of dotting tools (which can be as simple as the end of a bobby pin or a toothpick) will open up a world of possibilities for details and lines.
- Clean-Up Crew: Keep some pointed Q-tips or a small, angled eyeliner brush dipped in nail polish remover handy for cleaning up mistakes around your cuticles. This one step makes any DIY manicure look professional.
5 Pro Tips for a Flawless, Long-Lasting Application
- Patience with Layers: Always apply thin coats of polish and let each one dry completely before adding the next. This prevents bubbling and smudging and is the secret to a smooth finish.
- The Clean-Up Trick: After you’ve painted your nails and the polish is still a bit wet, use your clean-up brush dipped in remover to tidy the skin around your nails. It’s a game-changer for a crisp, clean look.
- Seal the Edges: When applying your top coat, gently swipe it over the very tip of your nail. This “wraps” the polish and helps prevent the tips from chipping prematurely.
- Dry Time is Sacred: Allow a good 30-60 minutes for your manicure to fully set before you do anything with your hands. This is the perfect time to binge-watch your favorite show!
- Cuticle Care: A little bit of cuticle oil applied daily after your manicure will keep your nails and the surrounding skin looking healthy and can even help your polish last longer by providing a better base.
Your Halloween Nail Adventure Awaits!
Remember, the goal isn’t perfection—it’s to have fun and get into the spirit of the season. Your nails are a wonderful, personal way to express your creativity. Whether you try one simple accent nail or go for a full set of gothic glam, the most important thing is that you love it.
So, put on a classic Halloween movie, lay out your polishes, and see where your inspiration takes you. I can’t wait to see what you create!
I’d love to hear from you! Which of these styles are you most excited to try? Do you have a favorite Halloween nail memory? Share your thoughts, your own tips, or even a picture of your creation in the comments below! Let’s get a spooky nail inspiration party started.